It is interesting that our eye can detect some very subtle variations but can fool us just as easily. Is A longer, shorter or the same length as B?
Our brains want these similar appearing shapes to be the same size, but in fact A is not quite as long as B. This phenomenon can be a hindrance, but we can also use it to our advantage with woodworking.
It was this concept that helped me get over a major step in my most recent project; carving out a gooseneck moulding by hand. Having returned last month from another fine class at Jeff Headley's
Woodworking Workshops of The Shenandoah Valley, we had finished many key components and had a good understanding of the elements needed to complete our Shenandoah Valley Tall Case Clock. I must admit that I had to cram quite a bit of information on the last day, not being quite sure if I would understand how to complete the project. At the class, we focused building mostly the base and waist, and then we were given instruction on completing the hood. What I thought was daunting after returning home, all fell into place as each step was broken down. The cut list, plans and CD and my photos during the class provided me with the good guidance.
 |
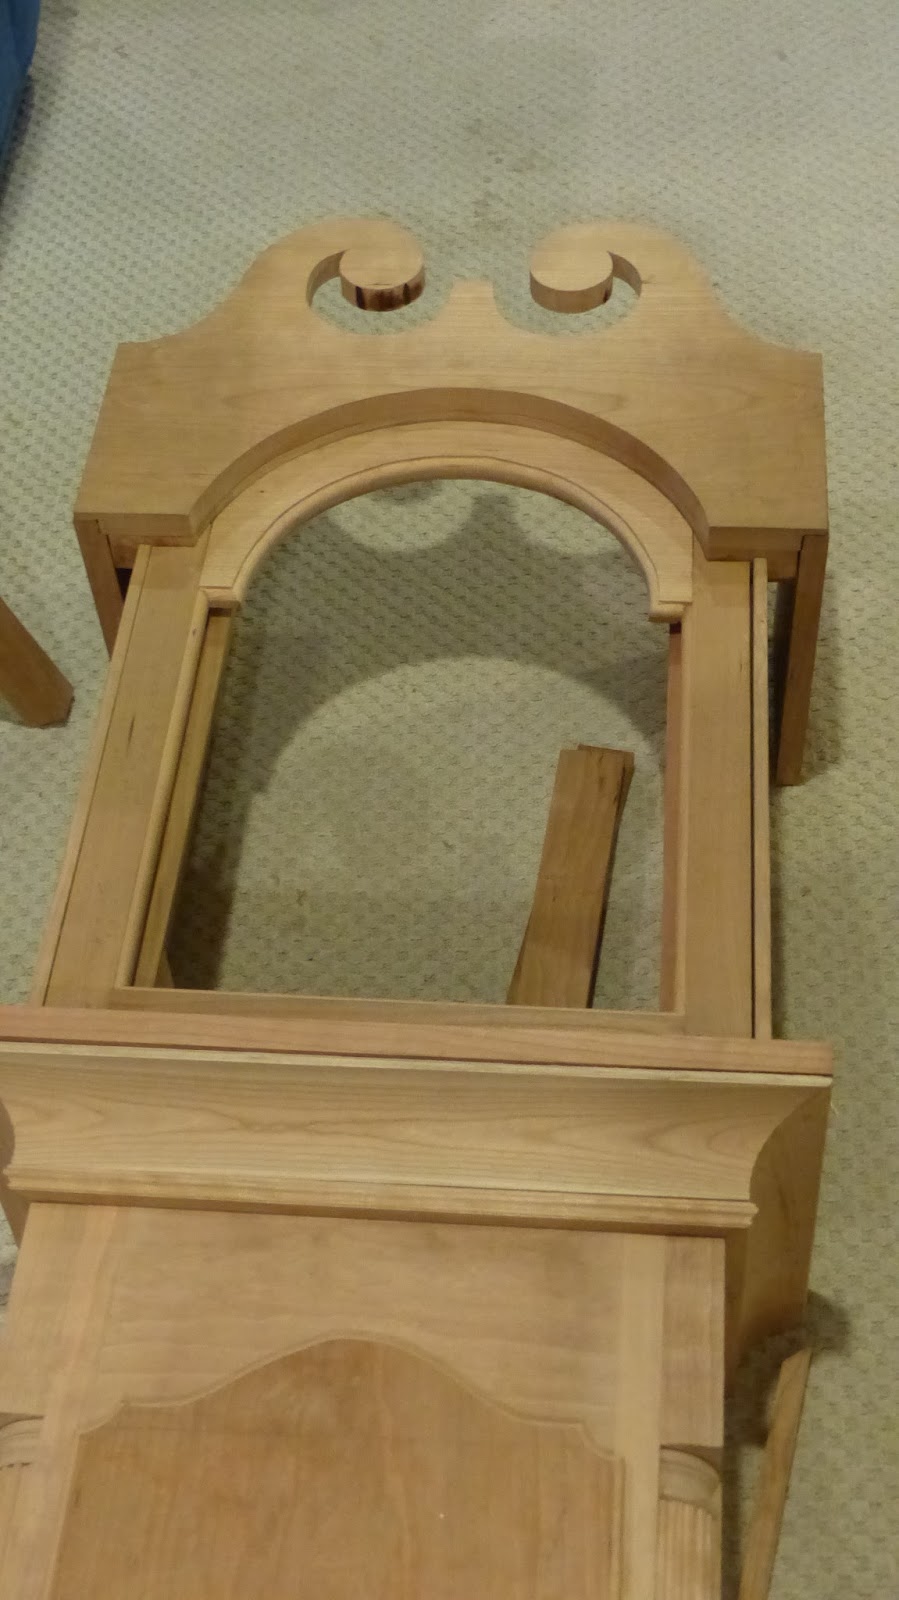
The tall case clock looked like this upon returning home from the
WWOTSV classs. Most of the base and waist was completed. The base of
the hood and sides of the hood were also prepared during the class.
|
 |
After slowly plugging away, the hood was partially completed.
The dreaded gooseneck mouldings were to follow. |
For the gooseneck moulding, Jeff offered a couple of options with power tools including a large shaper bit that he had on hand, but also gave us suggestions on how to use a pin router setup. But, I was determined to try to make these curved mouldings by hand, as they had centuries ago. This was only my second try at gooseneck mouldings, the first being a miniature piece. The fear was that I would not be able to get the return mouldings to match the curved gooseneck mouldings. This concern was further heightened by me asking hand tool experts how one would go about making these mouldings by hand. The universal answer was, "They just carved it out".
The Enemy of Good is Perfect
The key to hand carving these mouldings is that you only need to settle for good, not perfect. As long as the mitered corners match, a subtle rise or dip of a fillet or cove will go unnoticed in our mind's eye just like the optical illusion above. A close look at the originals shows some subtle imperfections.
 |
Tall Case Clock at The Heinz History Museum. While not obvious, the left
gooseneck moulding is slightly higher than the right at the apex of the arch. |
Here are the steps that I used in making the curved gooseneck (swan neck) moulding:
- Make a template
- Transfer to desired thickness of wood
- Cut out shape with band, scroll, coping or bow saw.
- Clean up top and bottom edges with flat and curved spokeshaves
- Create a couple of scratch stocks of the profile
- Place a cutting gauge mark at critical points
- Gouge and hand rout out the bulk of the material
- Follow up with scratch stock
- Gouge out more material as indicated by the scratch stock
- Clean up with scratch stock and sandpaper
- Cut 45° miter
Let's look at some of the steps in more detail:
Scratch Stock:
Two profiles were created as scratch stocks. One profile was the entire profile of the moulding. The other was the ovolo and fillets at the top of the moulding. Ensure that the holder for the blade has a thin rounded profile so that it can better trace the curved profile.
 |
| Create a paper or cardboard template of the compliment of the profile |
 |
| Apply layout fluid to an old saw blade and trace the pattern. |
 |
| Follow close to the line using a special hacksaw blade (The Incredible Blade at Harbor Freight) |
 |
| File profile |
 |
| Hone the edge and sides to create a sharp edge |
 |
| The second profile includes only the top ovolo and adjacent fillets. |
 |
| Use the scratch stock to lay out the profile on the end of the stock. Notice that a horizontal straight section is left to facilitate cutting the 45° miter. The key elements can be scribed out with a scratch stock or cutting gauge. |
Remove The Waste:
As they tell me, "It is so simple...just remove everything that is not supposed to be there". The bulk of the material was removed with a large No. 6 sweep gouge as well as a router plane.
 |
| Use the smaller diameter reference edge on the marking gauge to better follow curves. |
 |
| Hog out waste. Even though this photo shows the straight section not carved out, this section can be carved out as long as the bottom edge is left untouched. |
 |
After routing and carving, the scratch stock can be used to figure out
the location of the high and low spots. Pencil marks can be applied. The scratch stock will remove the marks from the high spots. These high areas can be removed with the gouge. |
 |
| You only get one try to get this right. The long horizontal waste piece provides a place to clamp and a reference surface. |
Much Quicker For The Return Mouldings
I chose to use a moving filletser plane and the Stanley 55 plane with modified fence (see prior
post) and finishing off with the scratch stock for the return mouldings. This straight section could certainly be shaped with hollows and rounds.
 |
This rabbet was cut to allow the angle cutter from
the Stanley 55 plane to be positioned properly. |
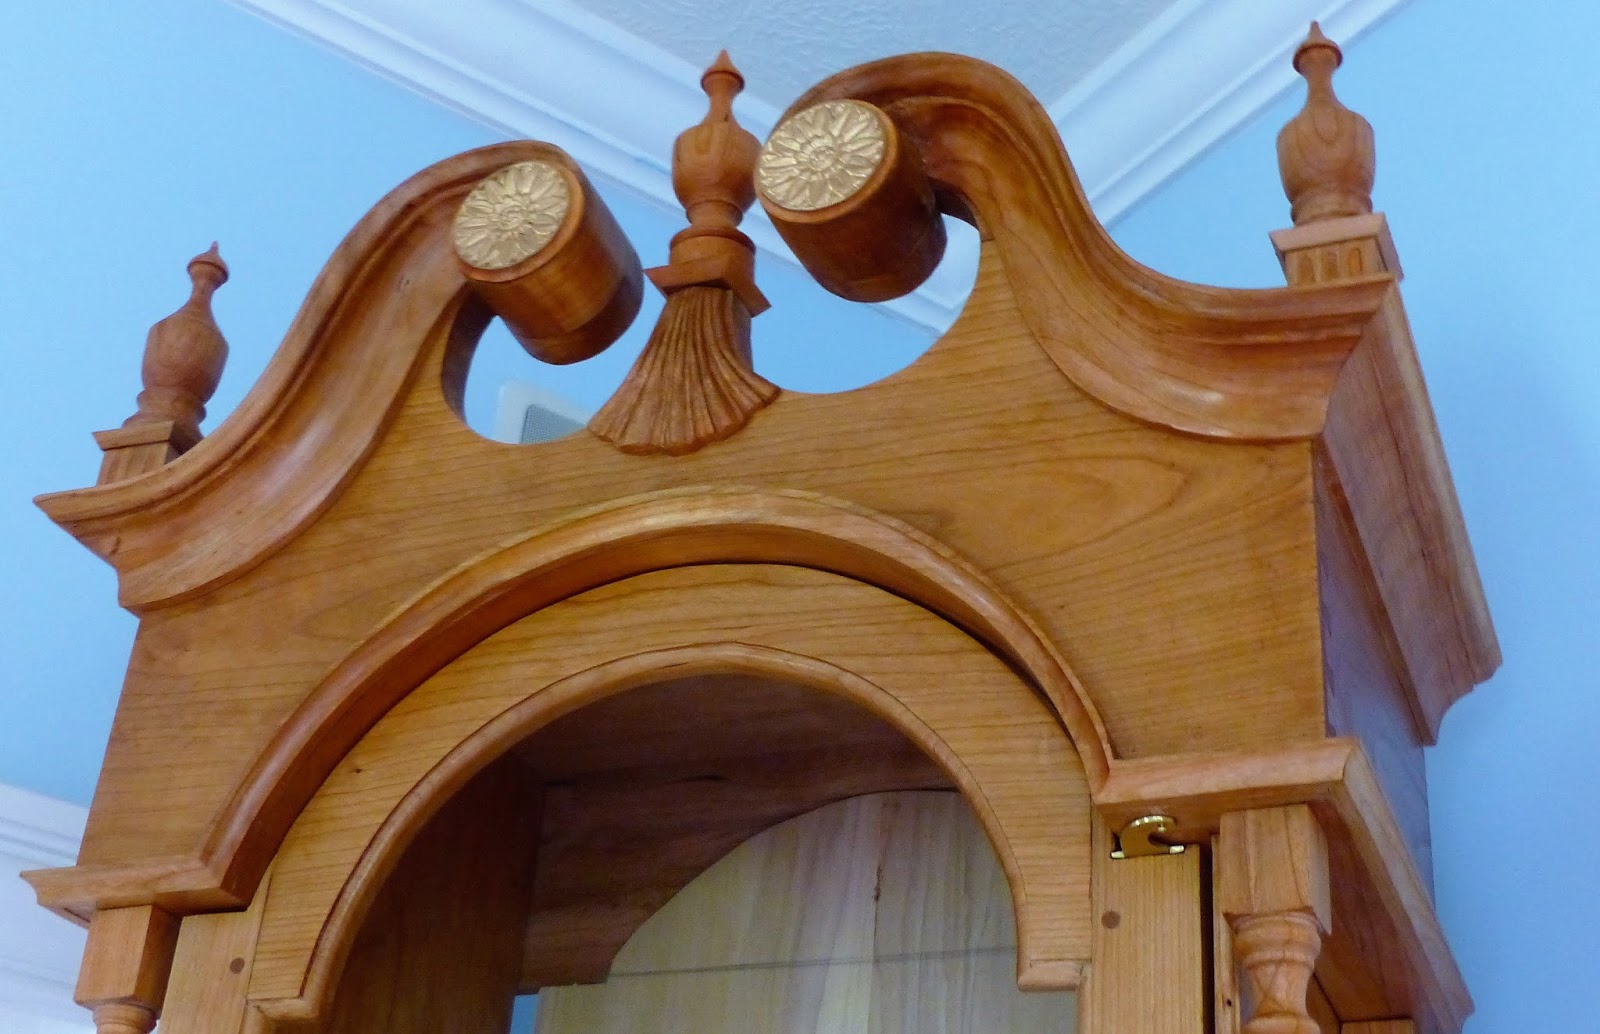
After cutting the miters and trying to match the miter for the curved section to the straight section, it was not an exact match. So, the fillet and a cove was lowered to match. A gradual rise was created from the low points to be almost imperceptible.
The challenge should be less daunting the next time.
 |
This gooseneck's fillet was probably the most egregious "fudge" of the moulding.
It had to be gradually lowered as it approached the miter to match with the return. |
 |
| A joint effort by my daughter and me for the painted moon dial and corner spandrels |
 |
| Pittsburgh viewed from Mt. Washington based on a George Beck painting |
 |
| George Beck's Pittsburgh, 1804 |
 |
| St. Andrews golfer based on an 18th Century painting by an unknown artist |
 |
| Here is the original painting. |


Fantastic post. I learned a lot. I've never made a swan's neck molding, but hope to. I'd probably use a few power tools to hog out some of the waste, but definitely rely on scrapers to do much of the fine tuning. I never really knew how to make the scratch stock either (other than very simple shapes), so this was informative in that regard as well. Great post.
ReplyDelete(I deleted & re-posted after spelling correction :)
--Wm. Brown
Forest, VA
www.LineAndBerry.com
This is really encouraging, thinking of building a tall clock myself.
ReplyDeleteIf you can cut dovetails and make mortise and tenons, are patient, and are willing to spend at least as much time thinking about how to make the clock as you actually spend making it, then you will have the necessary skills. The gooseneck mouldings alone may take a few shop session days to make. The traditional woodworking methods are not the quickest, but can be oh so satisfying. A week long class removes much of the intimidation factor.
DeleteOnce again, I loved this post.
ReplyDeleteWhat is the 'honing' device that you used to shape or hone the scraper profiles? I can see the photo (says "CRKT" on the tool) but I do not recognize the tool. Looks very useful.
Thanks,
-Bill
Here is the link describing the 600 grit Diamond sharpener. I use it quite a bit.
Deletehttp://ads.midwayusa.com/product/399387/crkt-veff-sharp-600-diamond-grit-stepped-sharpener?cm_mmc=pf_ci_google-_-Knives+%26+Tools+-+Knife+Sharpeners-_-CRKT-_-399387&gclid=Cj0KEQjwoM63BRDK_bf4_MeV3ZEBEiQAuQWqkRYEB4wzceSNT0XCwMz8ANT9_OPDu68bBOaAcz8ZMw4aAlFI8P8HAQ
Thank you very much for the info.
ReplyDelete--Bill