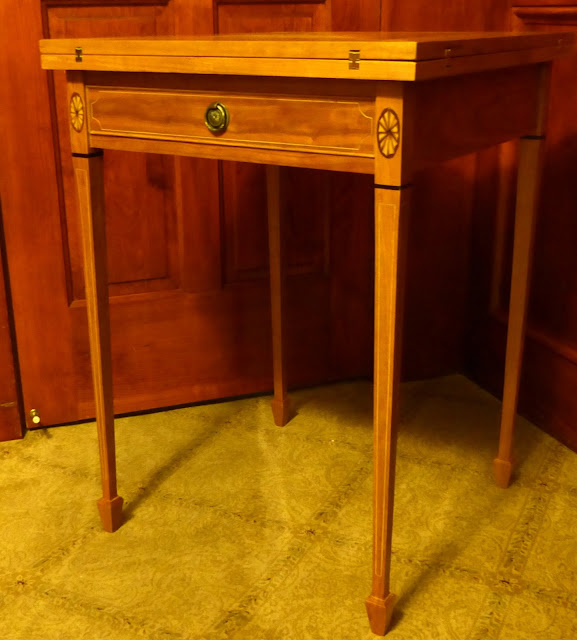
Envelope Table Mechanism
A few years ago, I visited an antique store that had a small envelope table with four triangular leaves meeting at the center that opened up from the center to reveal a card table, or so I was told. The table was in the closed position and I kindly asked the salesperson if I could open the table to see the inside. Unfortunately, she said, "No." I stared at the table quizzically for a moment, both to figure out why the lady was so rude and to figure out how the leaves would open up since they were so tightly fitted in together. There were no opportunities for photos. Not understanding the construction too well, I hadn't really thought of building this table. I have never seen another table like this in person.
Then, at our local woodworking club, I picked up a dog-eared copy of the October 2010 issue of Woodworker's Journal in which Ralph Bagnall provides detailed instructions for the construction of the table. I used his plans to construct my table. There is an abbreviated version on the Rockler website and he also sells more detailed plans here. Unfortunately, he too was flummoxed on the mechanism of how to open the leaves. His solution was to place an elegant brass pull on one of the leaves.
Upon reviewing a few images of other antique tables online, there seemed to be a small hole in one of the fan-shaped corner blocks. (If you look at the linked image, the small hole is near the top of the image.) Somehow, this hole was probably related to popping up one of the leaves.
 |
| My version of the envelope table |
Here is my version of the table leaf pop-up mechanism:
 |
| One leaf will pop up when the table is rotated a few degrees. This will allow you to open the table leaves. |
 |
| Stepped hole (ignore the mess up hole to the left) in the fan-shaped corner block. |
 |
| Magnet, left, and steel rod, right, which are placed in the stepped hole. |
 |
| The sloped plate from an old saw blade was cut with a multi-directional hack saw |
 |
| Final shape of sloped plate prior to insertion into its groove. |
UPDATE:
I finally spotted an Edwardian era envelope table almost 2 years after making my table and was allowed to inspect the button mechanism. The mechanism is a bit different than my design. The button itself seems to be made of a hardwood such as ebony. It is spring loaded with the button capable of protruding either above or below the table, but naturally sits below the table when free. There is a cup-like depression within the corner of the table base below the table. When the table is in the closed position, the button protrudes into the cup and therefore is not protruding above the table surface. Now, when the table is rotated, the button rides up along the cup and eventually on the flat surface of the base for a short length at which point the button protrudes above the table surface in turn popping up one of the leaves. Further rotating the table causes the button to clear the flat surface and the table base to be sitting over nothing, with the button retracting back down to be out of the way when the leaves are opened. Now, that leaves me with a new question. How exactly was the spring button designed? It could be locked in place with a threaded insert.
In a way it is similar to my design in that a button rides up a slope. But, this cup design gets rid of the track that I used on the undersurface of my table. As long as the button can be made and secured in place, the construction is simpler than the method I had used.
 |
| Position of button with the table fully closed and not rotated. |
 |
| Cup would be here. |


Good stuff. I'm making a series of Federal end tables, based on Steve Latta's design in FWW. I think I'll use this form for my next one. What's the mechanism for turning the top, just a simple bolt or some sort of lazy susan?
ReplyDeleteThanks for sharing this post.
--Bill
www.LineAndBerry.com
Yeah, just a simple bolt with a nylon lock/stop nut.
Delete