Rule Joint With The Stanley 55 Plane
A drop-leaf table typically contains a joint that is aesthetically appealing both when the leaf is up or dropped down. The tabletop contains a 90° ovolo with a fillet along the top edge. The drop-leaf contains a 90° cove with a fillet along the top edge. This joint, known as a rule joint or table joint, has the appearance of a 90° ovolo with flanking fillets when the leaf is down. When the leaf is up, the rule-joined leaves and tabletop are visible only as a thin line. The hinges, which are mortised into the undersurface, are concealed by the joint throughout its range.
 |
| A rule joint, from A Manual of Carpentry and Joinery, by J. W. Riley, 1905. |
The layout of a rule joint is important. A table joint hinge has a short wing and a long wing. The long wing attaches to the drop-leaf since it needs to span over the empty recess from the cove. In order for the cove from the leaf to ride on the ovolo as the leaf is brought up, The center of the pin of the hinge needs to be at the center of a radius that traces the ovolo, or quarter circle.
 |
| First test piece: The left board represents the drop -leaf and the right piece represents the edge of the table. |
Based on the illustration from A Manual of Carpentry & Joinery, I made a test piece with the Stanley 55 using standard cutters and it seemed to be OK. But, once I tried to fit the hinge like the drawing, I ran into problems. Rule joint hinges need to be placed upside-down relative to a typical hinge, with the barrel buried into the wood so that the center pin lines up with the center of the radius.
With a cavity made to position the barrel to the center of the quarter circle, the hinge worked OK, but the leaf hung too low showing an unsightly gap. How can that be corrected? Looking more closely at the illustration from A Manual of Carpentry & Joinery again, the ovolo is not a true quarter circle. It flattens at the 12 o'clock position and is wider at the 9 o'clock position. That corrects for the hinge being below the center point of the quarter circle. If the hinge was mounted where it is in the illustration and a true quarter-circle ovolo was made, the junction of the fillet and cove from the drop leaf would dig into the ovolo as it was lifted up.
A trip to a few antique stores as well as reviewing the "Table Joints Rule" episode from the Woodwright's Shop revealed the more common method of installing the hinge. The hinge plates are placed into hinge mortises so that the wings of the hinge are flush to the surface of the wood. The barrel is centered again at the center point of the quarter circle. In order to fit the hinge properly, there needs to be extra wood below the quarter circle corresponding to the thickness of the wing of the hinge.

A rule joint can be fashioned in several ways using:
- A combination of a rabbet plane and hollow and rounds
- A dedicated set of rule joint planes
- A shaper/router (pedal or electric)
Never trying to give up on the variety of uses of the Stanley 55 plane, I gave the rule joint a try with the "55". If you do not own or have handled this plane, you may have trouble following these instructions.
For the first attempt, I made a custom cutter from a leftover cutter to make the cove portion. To fashion, the cutter, a bit of geometry is needed. See this post for details. After some fiddling, I realized that my custom cutter was so close to my existing No. 62 profile that I shouldn't have wasted my time on the custom cutter. So, just grab your Stanley 55's cutter number 62 to create the ovolo and cutter 38 to create the cove.
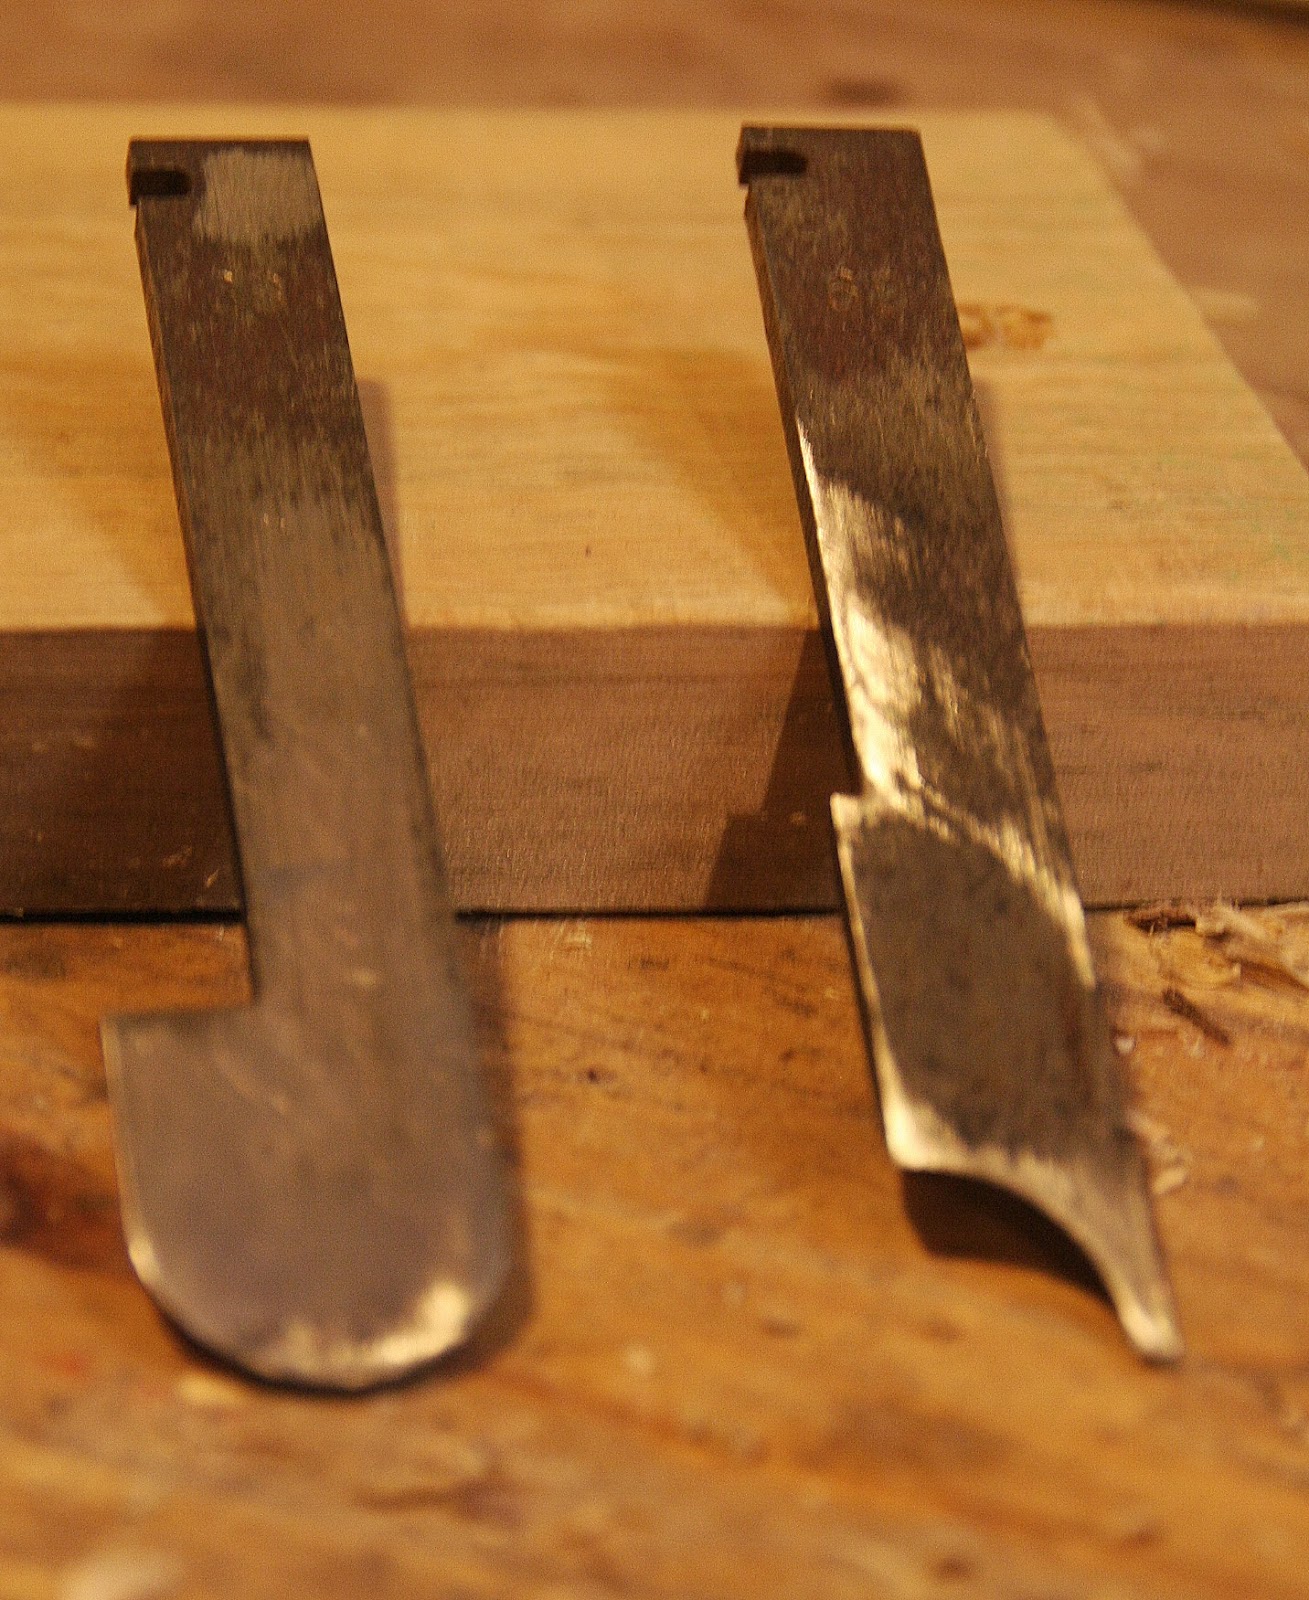 |
| Stanley 55 cutters, #38 on the left and # 62 on the right |
Make the ovolo first by placing the board with the top surface facing you in your vise and setting the #62 cutter for a fine cut. Use both fences, both main runners and the auxiliary center. The right side of the blade (where the notch on the cutter is located) should be located about 1 mm inside of the edge of a 3/4" board so that the right depth stop can be used to create a consistent shape. Plane down until that little 1mm fillet to the right of the blade is barely visible. Once this little fillet is spotted somewhere, stop and set your depth gauge flush with this fillet (for me it usually turns out to be on the far end). Then take a few more passes to even out the ovolo.
 |
| The front end of the Stanley 55. Employ both fences and all 3 runners. Note the barely perceptible tiny fillet. The small fillet allows the use of the right depth stop. Alternatively, the fillet could be avoided by using the left depth stop. |
You are then left with, from left to right (as viewed from the planer's view), an uncut segment, a small gap, the ovolo and a 1 mm barely perceptible fillet. Knock down the uncut left segment with a rabbet or shoulder plane and the right mini fillet with a low-angle block plane.
 |
| You are then left with, from left to right, an uncut segment, a small gap, the ovolo and a 1 mm barely perceptible fillet. |
 |
| Removing the uncut segment with a moving filletser plane. |
 |
| The final edge of the "tabletop". Ignore the sliding dovetail notch...this was a scrap piece. |
For the cavetto, place your #38 cutter in the Stanley 55. You will notice that the main skate/runner sits in the center of this cutter. If your Stanley 55 has its left depth gauge, this is one of those rare times when you will need it. You will need to install the left gauge before the next step. Place the additional auxiliary center skate and left skate so that all three skates are abutting each other and adjust the depths of the skate for a fine cut. The depth of the fillet of the ovolo from the tabletop needs to be transferred to the leaf. Use a depth gauge to measure the distance from the tabletop surface to the top edge of the ovolo. Place your drop-down leaf in the vise so that the top surface faces you. Transfer the depth of the fillet to the drop leaf. Then line up the left edge of the cutter with this mark. Plane down until you are close. By placing your ovolo piece into the cavetto piece, you will know how deep to make the cavetto. Adjust the left depth stop as needed. You may need to take a sliver or two off of the right edge with a block plane for a tight fit.
That should do it for the rule joint. Resurrect your 99% nickel-plated Stanley 55 out of its pristine minty box and try a rule joint.
 |
| The Stanley 55 loaded with the #38 cutter. About 2/5 of the cutter on the side of the right fence (as seen on the left of this photo) will not be used for this operation. |
 |
| The Stanley 55 making the cove for the drop-leaf. All decked out for the Holidays using both fences, all 3 skates and the all but forgotten left depth stop. The uncut portion should be the same dimension as the depth of the fillet atop the mating ovolo. |
If the fit is good on these test pieces, save them as a template so that you can cut out a few of these steps if using another 3/4" board. You can set your fence positions and depth stops with these templates.
 |
| This ovolo, with fillet along the top edge, would be the edge of the fixed tabletop. Being satisfied with the fit, I saved this as a template for future rule joints. |
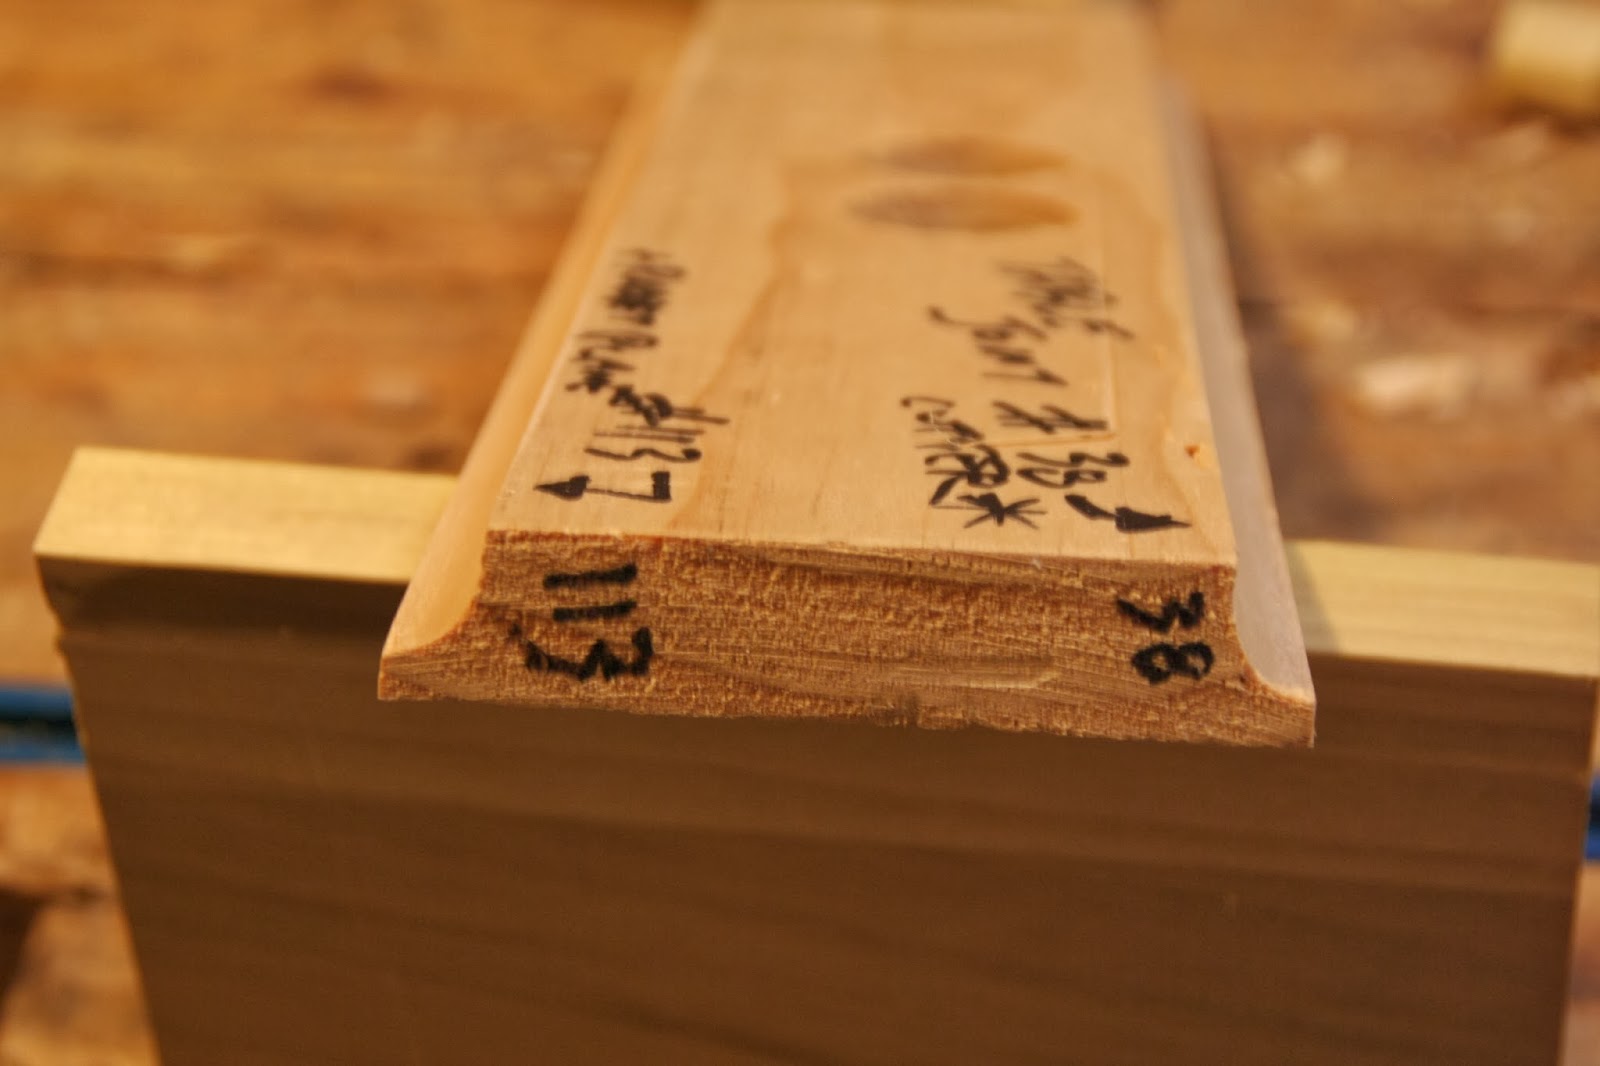 |
| The cavetto (cove) for the drop-leaf can be made with the #38 cutter or even the #113 cutter. |
 |
| The ovolo using cutter 62 for the tabletop in the photo below |
 |
| The cove for the drop leaf using cuter 38 |


Yowzah! The game table is beautiful. Not sure I had seen your blog before and I really like it. I looked at a couple of old posts and they were the type of thing I want to see on unplugged blogs. Hope to see more.
ReplyDelete