The Woodwright's School and a Traveling Tool Chest
Ten amateur woodworkers with varied backgrounds gathered together from all parts of the country (NY, PA, TX, CA, OR, NC, GA) in mid-September for a week of traditional woodworking sans power tools. After much anticipation, I finally made it down to Pittsboro, NC for benchwork week at the Woodright's School. It was better than I anticipated - entertaining and educational. Roy Underhill, the host of the long running PBS show, runs the school. Bill Anderson assisted. They are great teachers offering many pearls as we sawed and chiseled away. Despite 8-9 hour days, we were entertained throughout the week with tidbits of woodworking history and humorous shtick. We each had our own high quality workbench and could use just about any tool in the shop, as well as demo tools from Ed Lebetkin's stockpile of tools in his shop upstairs. Our final goal was to create a traveling tool chest using various joinery techniques including dovetails, mortise and tenon joints and a raised panel. All told, I think we all put in about 25+ hours of work into the tool chest.
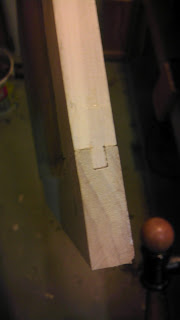
We started out the week by spending the very first hour joining two pieces of wood by whatever method we chose. It was a good way to warm up to the tools and to each other. After the hour, we talked about our method and ways of improving our technique.
 |
Laying out the tails
|
After cutting out the tails then pins, we used hide glue to put the box together. This is where teamwork was needed since the glue dries quickly. We had 3 or 4 of us helping to glue and clamp each box .
Roy demonstrating his custom single stroke dovetail saw.
After the boxes were assembled, the not so famous magicians, Alex and Roy, performed a variation of Howard Thurston's famous trick using the world's longest dovetail saw (affectionatelty called "The One Stroke") and our newly created boxes.

I added 5 bead lines with the No. 55 plane, two of which were not on the board edges, to provide equally spaced beads. I picked up this moving fillister (fillitster?) plane from Ed's shop upstairs as well as a sweet cutting gauge (in the finished tool chest below).
Of course, in order to graduate for the week we had to hone our skills in the fine art of saw twanging.
With all of the power behind the tools being generated by us, we worked up pretty good appetites. Pittsboro has a fine selection and variety of restaurants given its small population. All ten of the students, Bill and Roy broke for lunch around noon daily. We dined at a Greek restaurant, the soda shop next door, an old fashioned diner, and a market (similar to Whole-Foods).
Next, we moved on to the bottom skirt. The skirt has a moulded profile on its top edge. One of Bill's areas of expertise is moulding planes. I fiddled around with a few of the traditional wooden moudling planes, but I ended up succumbing to my old faithful, the Stanley 55.
Finally, a rail and stile raised panel lid topped off the chest. We learned about haunched tenons and how to position the groove for the panel. Roy also showed us the process of drawboring a tenon to cinch up the joint.
The week was well worth it for me. It provided me with a solid foundation and confidence that should allow me to pursue some more complex designs. Thanks fellow students and teachers. I had a blast. But, Roy said it was time for us to go.


Here's the chest after the week was done.
 |
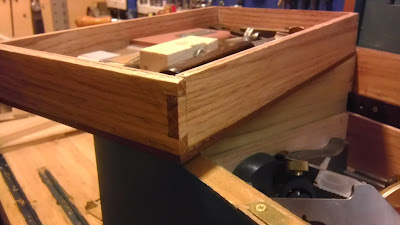
| Mitered shoulder through dovetail corner for the skirt |
Just a ltitle more work remained after returning home. I opted for a double decker till system, placed a full mortise lid lock, and painted the exterior with a blue paint (I attempted stain at first knowing that things might not work out since we worked with poplar-the oil stain was blotchy despite a wood conditioner). To break up the monotony, I used a product called Rub 'n Buff gold for the skirt and part of the lid. This thing can hold a fair number of tools, but is very heavy.
 |
| Double deck rails. The right hand bar for chisels is removable. The "55" adds many pounds. |
 |
| The bar holding the chisels is removable. |
 |
| Overstuffed chest |
 |
| Fold down lid to prevent cutting my fingers for the "55" cutters |
 |


Comments
Post a Comment